A long time ago, I was asked to create some C++ code for specific functionality intended for use in both Android and iOS. I won’t delve into excessive detail, but it was primarily for security reasons.
I must clarify that the main language is Swift and very rarely will you need to use C++ code to develop an app, but there are some fields where writing some parts in low-level programming languages will give you an extra layer of security so it could be recommended.
In this article, I would like to show you how to directly use your C++ code in your Xcode 15+ project for iOS and tvOS without the usual bridge, ensuring that if you encounter this scenario, you will have a straightforward guide to implement it.
Therefore, the purpose of this article is to demonstrate how to use low-level C++ rather than focusing on the C++ code itself, which is why I am using basic demo files. Here is an overview of the demo C++ files that we will use:
//
//  MyCppClass.hpp
//  cppexample
//
//  Created by davthecoder on 16/09/2025.
//

#pragma once
#include <string>

class MyCppClass {
public:
    MyCppClass(int val);
    std::string greet() const;
private:
    int value;
};
//
// MyCppClass.cpp
//  cppexample
//
//  Created by davthecoder on 16/09/2025.
//

#include "MyCppClass.hpp"

MyCppClass::MyCppClass(int val) : value(val) {}

std::string MyCppClass::greet() const {
    return "Hello from C++, value is " + std::to_string(value);
}
//
//  module.modulemap
//  cppexample
//
//  Created by davthecoder on 16/09/2025.
//

module MyCppModule {
    header "MyCppClass.hpp"
    export *
}
//
//  cppexample-Bridging-Header.h
//  cppexample
//
//  Created by davthecoder on 16/09/2025.
//  Keep it empty
Would you like to try by yourself? Here is how it should look in your project:
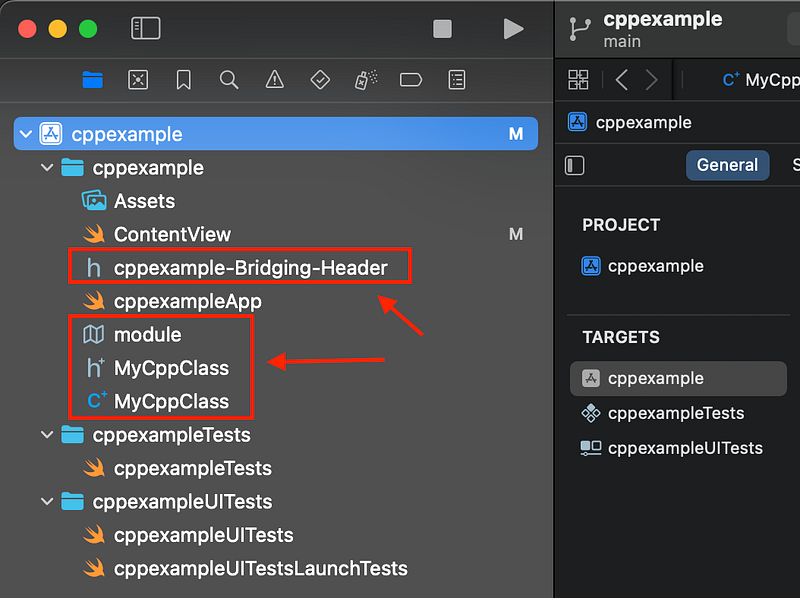
Now that we have created and filled our .hpp, .cpp, and .modulemap files with the code above, there are a couple more steps we need to take.
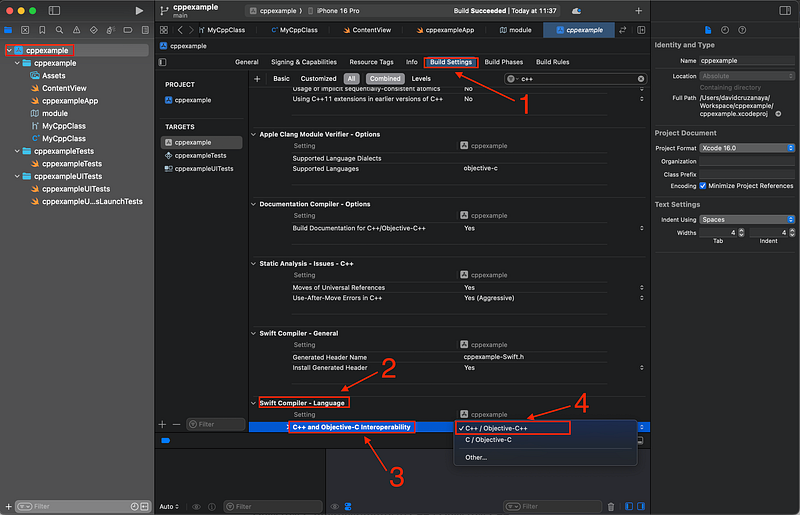
the first one is to declare in Build Settings > Swift Compiler Language > C++ and Objective-C interoperability to C++ / Objective-C++
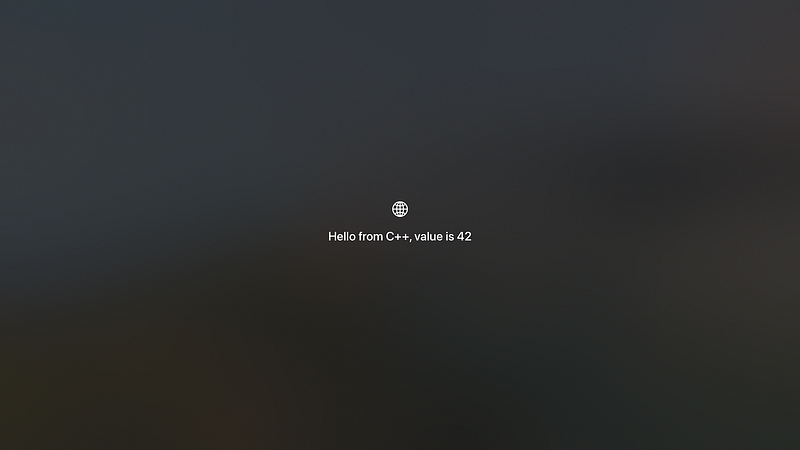
The second step is to actually call the C++ code in our Swift file. In this demonstration, I will use the default Content View that is generated when we create a new project from scratch.
//
//  ContentView.swift
//  cppexample
//
//  Created by davthecoder on 16/09/2025.
//

import SwiftUI
import MyCppModule // <-- Import the C++ module

struct ContentView: View {
    var body: some View {
        VStack {
            let cppObj = MyCppClass(42) // < --Create an instance of the C++ class
            Image(systemName: "globe")
                .imageScale(.large)
                .foregroundStyle(.tint)
            Text("\(cppObj.greet())") // <-- cppObj.greet() Call a method from the C++ class
                .padding()
        }
        .padding()
    }
}

#Preview {
    ContentView()
}
Once you’ve successfully added the files and made the necessary changes to your Xcode project, you should be able to execute your C++ code.

Loading comments…